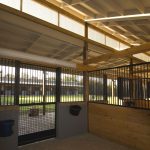
After focusing on the specifics of stall door design last week, I thought we would zoom out to stall design. The first thing to determine is size. Typically, the average stall is around 12’ x 12’. Here at Blackburn, we frequently design stalls that are 14’ x 14’ or 12’ x 14’ (because of owner preferences). We have been known to go larger for big horses and foaling stalls, but we very rarely go smaller and don’t advise it unless the stalls are for ponies, miniature horses, etc. Keep in mind, and this is a valuable tip, it is usually cheaper to increase your barn’s length dimension, than it’s width. As you consider the size of your stalls, remember that due to the pricing of longer span roof rafters, using 2 x 10s or 2 x 12s (in the width direction of your barn) is preferable to 2 x 14s (or larger) for the entire length of the barn. It makes more sense if you have a 12’ x 14’ stall, that the stall would be 14’ wide and 12’ deep.
Often, clients want flexibility. They do not have any immediate plans to breed, but want the option. In this scenario, I recommend a removable partition or hinge partition between two stalls. This allows you to efficiently use the space until you have the need for a larger stall.
Now you may be wondering, why wouldn’t I make my stalls bigger? I want my horse to be comfortable and I have room. There are two main negatives. Usually the most prohibitive one is the cost of building the barn, while the cost of bedding tends to get overlooked. The larger the stall is, the more bedding you will use, the more time it will take to clean, and the more waste it will produce.
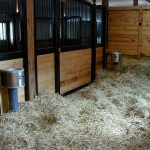
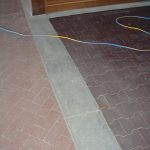
After deciding on your stall size and placement, the next consideration is flooring. There are many flooring options to consider, some being natural dirt (issues with odors/mess), sand with mats on top (best low cost solution in areas where sand is prevalent), dirt/stone dust with mats on top (best low cost solution where stone dust is easily obtainable), stone dust with an embedded grid (grids frequently warp and need to be replaced more often than mats), bare concrete (worst solution- never want to expose concrete around horse), concrete with mats on top (need to think carefully about drainage), popcorn asphalt (drains well but might need to add additional drain tile below if poor subsoil drainage conditions), and interlocking rubber brick (the best all around in my opinion, but most expensive). Some owners like stall mattresses, but remember they cost more and may need eventual replacement. Although it may reduce bedding needs, they add upfront cost.
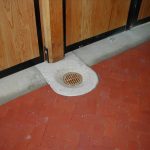
With all options, you have to consider how the stall will drain, especially if your soil is mostly clay. I would not advise drains in a stall, unless you can direct them to a clean-out catch basin or daylight drain, since they would only get clogged. Instead, we subtly slope the stall towards the aisle. In general, people clean their aisles at least once a day, but may only wash down and flush out a stall a couple times a year. In instances where this is impossible and we have to drain to the outside, we have designed a concrete channel on the exterior with an access gate (or Dutch door opening).
On a side note, vacuuming or sweeping your aisles is never good for the health of your horses, unless they aren’t there. Even then, I recommend washing where possible (and where water availability is not an issue). You want to avoid the circulation of dirt, dust, and the bacteria that goes with it.
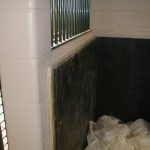
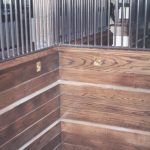
Moving on to the walls. The big choice with walls is using concrete block or wood. Keep in mind that block walls require filling the voids within the blocks, adding re-bar for strength and painting over them with a filler coat before final paint. Otherwise, bacteria can get in these grooves and grow. For people worried about their horses kicking concrete walls, we add rubber mats up to about 4 ft. Wood stall walls are much more forgiving, and for that reason I prefer them. In my opinion, the best looking solution (but more costly) is installing wood wainscot up to 4 ft around the interior of the stall. It is a convenient way to incorporate a casting groove (in lieu of a rail) that is largely hidden, protected from cribbing, and permits ventilation behind the wainscot (better to preserve the wood). We always make sure that the interior is a flat surface, so there is nothing for the horse to chew (noting that a horse stuck in a stall for long hours will also try to chew a flat surface. You might do the same if you were stuck in there for long hours). Also, one needs to use blind nails and preferably screws, so there is no possibility of injury to the horse.
I recommend mounting a stall fan high on the exterior wall facing down from the eave and in a fixed position. Ideally, if the barn is designed correctly there is fresh air coming into your eave, and this is much better than pushing stagnant air from the aisle. A fixed fan allows the horse to choose if it wants to be in the fan’s breeze and gives them greater control of their environment.
I try to have two lights in every stall, one on each side. This helps remove shadows that occur with one, which is helpful if you need to look at your horse’s legs or hooves. Each stall should have its own light switch, fan switch, and outlet on a nearby jamb or column. This allows you to selectively turn on lights (which is more energy efficient). Keep in mind, that with natural daylight, most of our barns utilize no electric lights during the day. Turning on the lights would be reserved for at night, and in that case you may not want to wake up the entire aisle. No matter how you plan to do the lighting, all wiring should be run in conduit or BX cable (even if it is in the wall) to prevent any unnecessary problems from chewing by horses or rodents.
For all the other add-ons, such as automatic waters, buckets, hay doors, swivel feed trays, etc., I tend to prefer the traditional approach. If possible, it is always better to have someone actually go into the stall. With this contact, a person is more likely to note trouble or problems. Additionally, the add-ons are just another thing that eventually needs to be replaced if they break. However, the barn owner needs to determine how they want their barn to operate and how they want to spend their money. No matter what, if you are going to add a feed access hole through the stall, the uncovered opening type should be avoided. Have you ever walked down an aisle with these openings in the stall fronts near feeding time? Every horse is trying to reach its face into the aisle. And horses have been known to get a foot caught in them. This is dangerous, and a feed access gate is advisable.
Many of the other details fall to personal preference. While I tend to prefer earth colors the hold up to a little dirt for the wall finishes and light colors for the underside of the roof for light reflectance, it is the owner that customizes these to their needs. Just remember, nothing is more important than the safety and wellbeing of your horse. I’ll conclude with one example. Blowing down your aisle with a leaf blower may be faster, but it impacts health conditions. I always say, your barn does not need to cost you an arm and a leg, but neither should it, or how you operate it, cost you your horse.
If you are enjoying this small series of design tips be sure to pre-order your copy of my new book, Healthy Stables by Design.
